Getting started
This page takes you from installing EZvac to a room that heats and cools on its own. It takes about five minutes in game.
Install
You need Paper or Purpur for Minecraft 26.1 to 26.3, on Java 25 (Paper's own requirement). Minecraft 1.21.x on Java 21 still works in BETA 1.x, with a warning, but BETA 2.x will drop it.
- Put
EzVac-BETA-1.0-P10.jarin your server'spluginsfolder. - Start the server. EZvac writes
plugins/EZvac/config.ymland logs a line such asEZvac enabled: 0 thermostat(s), .... - In game,
/hvac helplists the commands you can use.
Building things needs ezvac.admin (operators have it). Players need only
ezvac.use, which everyone has by default. See Commands.
The setup
On a new install, the first operator to join is asked in chat to set EZvac up
(BETA 1.0 Pilot 10): [Set up], [Later] or [Don't ask again]. The
setup is a short menu of nine pages: °F or °C, wind speeds, the HUD for new
players (and its title), update news, backups, anonymous statistics and the
official addons. Each choice applies at once, and every one can be changed
later in /hvac quicksettings. /hvac setup runs it again any time.
The tutorial
The setup's last page offers Build your first system, and
/hvac tutorial starts it any time: a guided build in a world of its own
(BETA 1.0 Pilot 10). You're taken to a little hut on a floating platform, in
creative with what you need, and glowing blocks show where each part goes:
- a dispenser beside the hut, facing up;
/hvac create heatpumpon it;- a sign on the inside of the hut's wall, and
/hvac create thermostat; - four iron trapdoors under the ceiling, the vents;
- linking them all with the link tool;
- the casing around the heat pump, in any blocks you like.
Each step chimes when it's done. Stay as long as you like afterwards; leave
with [Back to my world] or /hvac tutorial leave, and you're back where
you were with your inventory and game mode. Your things are kept on disk
meanwhile, so leaving the server or a restart loses nothing. The tutorial
world is deleted 10 seconds after its last player leaves, so each tutorial
starts fresh. The rest of this page is the same build, written out.
The tutorial is basic for now: one heat pump, one thermostat and four vents. It will be expanded to more devices over time, such as pools, air purifiers, humidifiers and dehumidifiers, fridges and deep freezers.
Your first system
A system is a thermostat, the equipment that heats or cools, and the vents that blow the air into a room. You put them together with the link tool: select the thermostat, then click everything that belongs to it.
1. A room
Any closed room works. Doors and trapdoors pass air when they are open and stop it when they are closed, and carpets let air through, so a carpeted floor is still part of the room. See Vents and airflow.
2. The heat pump
A heat pump is a dispenser in a closed casing. While it runs it puts a block of water in the cell it faces, so that cell has to be boxed in or it spills. The usual build is a 3×3×3 cube, three layers of 3×3:
 bottom layer:              middle layer:              top layer:

 [casing][casing][casing]   [casing][casing][casing]   [casing][casing][casing]
 [casing][ disp ][casing]   [casing][ water][casing]   [casing][casing][casing]
 [casing][casing][casing]   [casing][glass ][casing]   [casing][casing][casing]

 disp: the dispenser, facing up
 water: left empty; the water appears there while it runs
 glass: optional, any side of the middle layer, to watch it
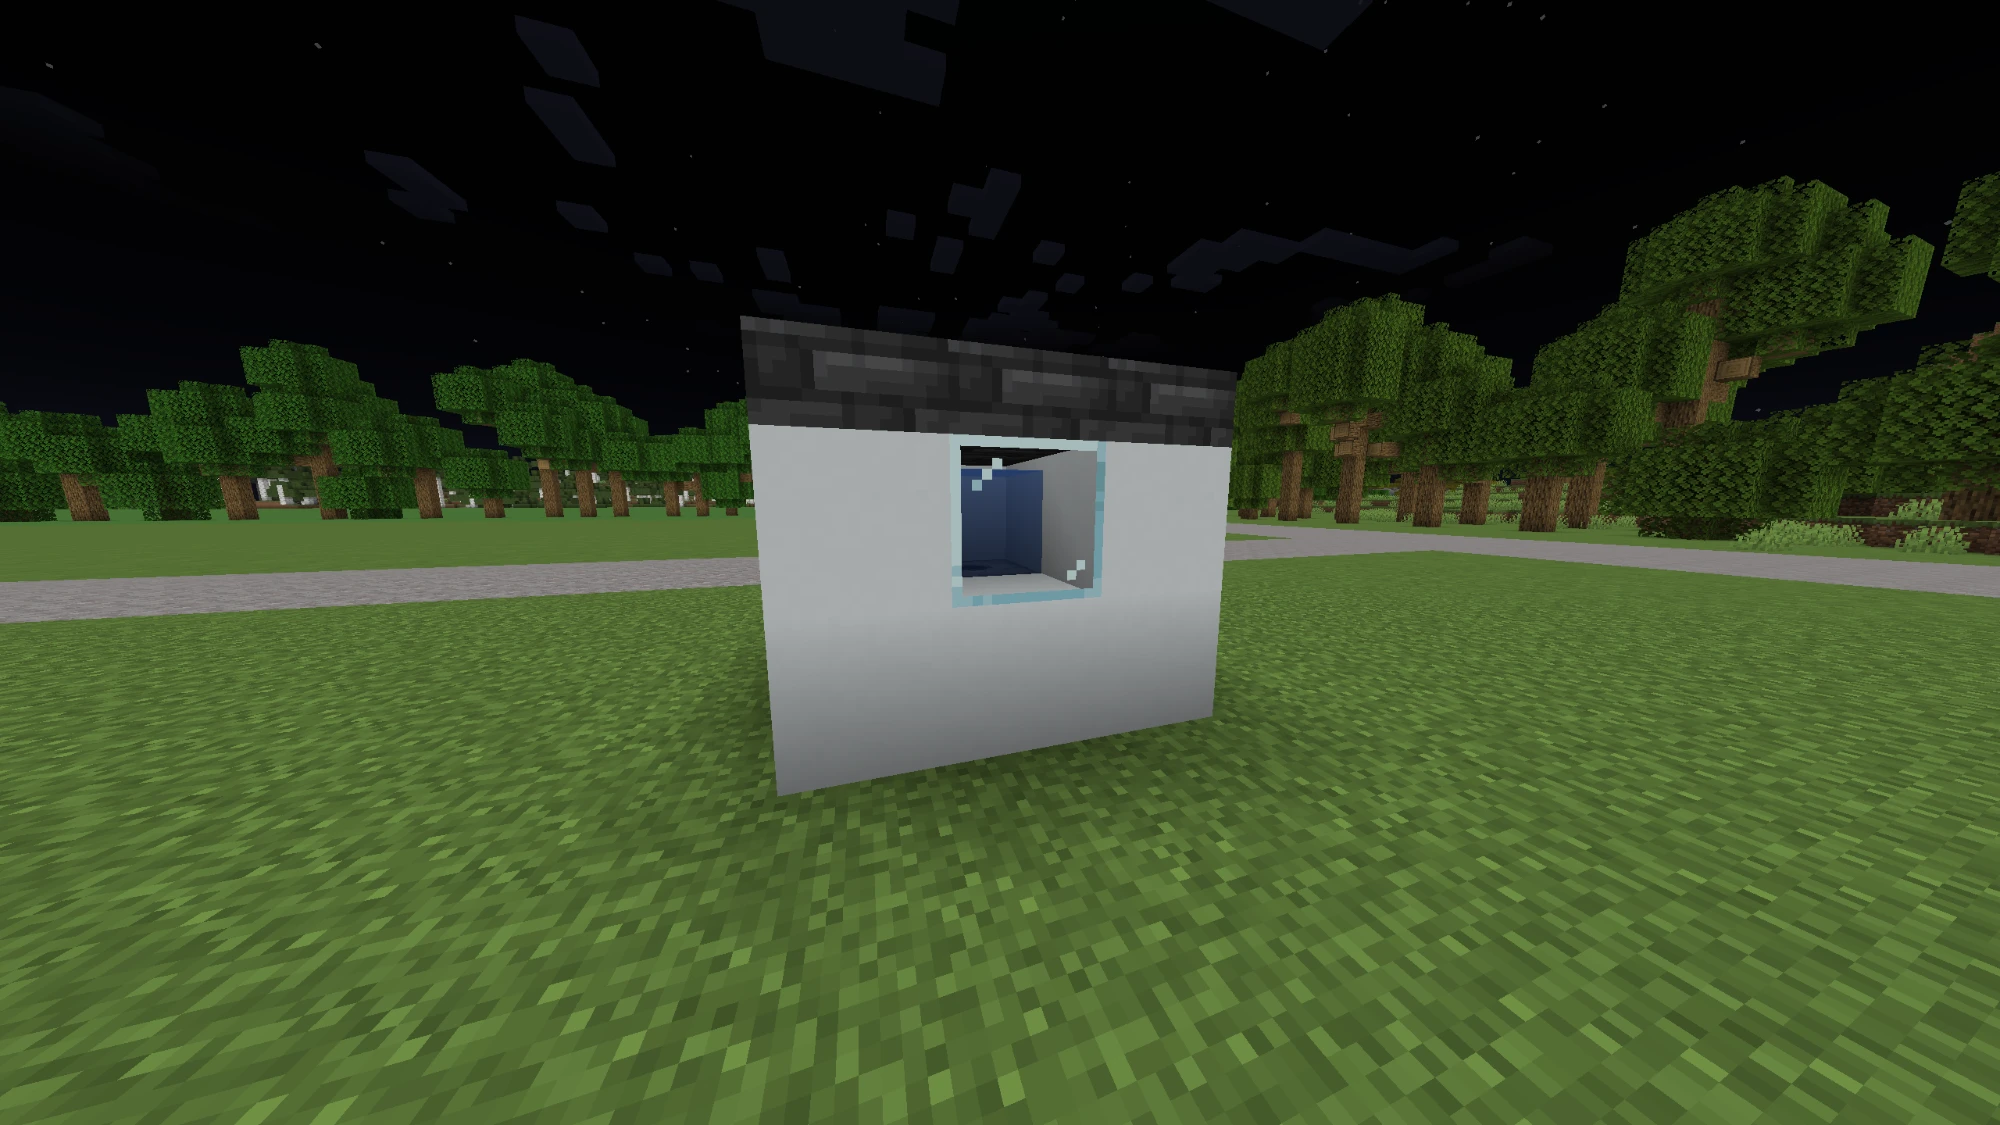
That cube is the ideal template, not a rule: style it however you like. Heat pumps, air conditioners and furnaces are all this same dispenser; only the command you create it with differs.
The casing doesn't have to touch the room: the room is reached through vents, linked in step 4. Look at the dispenser and run:
/hvac create heatpump
A finished casing hides the dispenser, so create it, and link it in step 4, before you put the last casing block on (or leave the glass window out until then): EZvac needs to see the dispenser for both.
More on every kind of equipment, and on the casing, in Equipment and thermostats.
3. The thermostat
Put a sign anywhere you like, look at it, and run:
/hvac create thermostat Home 72
Home is the thermostat's name, and 72 the target (72 °F if you leave it
out). Looking at a button on a wall instead makes a mini thermostat: the
same thermostat, with a small display on the button (BETA 1.0 Pilot 2). Names don't have to be unique: every house on the server can have a
Home. Temperatures are in °F unless the server uses Celsius (units: C);
72F or 22C always works. The sign shows the room temperature, what the
system is doing, the target and how long until it gets there:
EZvac | Home
68.4 F | HEAT
Set 72.0 F | 100%
ETA 0:52 | 1/1
4. Link it together
Vents are iron trapdoors in the room. Get the link tool:
/hvac link-tool
- Right-click the thermostat sign to select it.
- Right-click the heat pump's dispenser to link it.
- Right-click each iron trapdoor in the room to link it as a vent. A system needs at least one vent to start: without one, its screen says "Needs a vent" (BETA 1.0 Pilot 2).
- Sneak-right-click anything to unlink it again.
If you're holding the tool with a thermostat selected when you create equipment or a sign, it's linked straight away.
Air spreads from each vent through the room: full strength for 15 blocks of airflow, fading out by 30.
One ★★★ heat pump is enough for 1,860 blocks of air, a floor of about 465 blocks, 4 blocks high. A bigger build needs more units, or it heats and cools more slowly and its thermostat says Undersized. See Sizing.
5. Check it
- Stand in the room and run
/hvac temperatureto read the temperature, humidity and which system reaches you. - Look at the thermostat and run
/hvac infoto see how big the room is and whether it has enough units. /hvac hudkeeps the climate where you stand on screen. See HUD and placeholders.- To change the target, right-click the thermostat sign and use its menu, or
look at it and run
/hvac thermostat set 70. - To switch the whole system off, sneak-right-click the thermostat sign; do it again to switch it back on.
Next
- Cooling only, or a furnace for heat: Equipment and thermostats
- Heating or cooling a pool: Vents and airflow
- Drying a basement or adding moisture: Dehumidifiers and humidifiers
- Thermometers and remote sensors: Sensors and readings
- How weather and humidity work: Climate